Blurring the background in Lightroom is a fantastic way to enhance your photos by drawing focus toward the main subject while adding depth and a professional feel to your images. Lightroom offers tools and techniques that make background blurring intuitive, even for beginners.
Whether you’re working with portraits or creative landscapes, learning how to blur background in Lightroom, out-of-focus background effect can give your photos an extra level of sophistication.

Why Blur Backgrounds in Lightroom?
Background blurring, or “bokeh,” is popular in photography as it helps separate the subject from distracting elements. It’s also a way to create mood and artistic flair, giving your photos an edge in composition and focus.
With Lightroom’s extensive editing features, you can achieve this effect without needing specialized equipment like lenses with a wide aperture. Blurring the background in Lightroom can be as simple as applying a mask and adjusting some sliders, making it accessible and fun for anyone looking to improve their photos.
Basics of Background Blurring
To begin with, it’s essential to have Lightroom Classic or Lightroom CC installed, as both versions offer masking tools necessary for blurring backgrounds. Before blurring, ensure your image is properly exposed and adjusted to set a solid foundation for your edits.
If your subject isn’t isolated enough, consider enhancing its clarity or sharpness for better separation from the blurred background.
Simple Step-by-Step Guide
1. Select Your Subject
- Start by opening your image in Lightroom. Use the “Develop” module, where most editing tools are located.
- Go to the Masking Tool panel (indicated by a circular icon with a dotted border).
- Select the Select Subject option to automatically create a mask around the primary subject of your image. Lightroom uses advanced algorithms to detect and isolate the subject, but you can refine this if necessary.
2. Create Background Mask
- Click the Invert option within the masking panel after selecting your subject. This step will apply the mask to everything outside the subject, targeting the background.
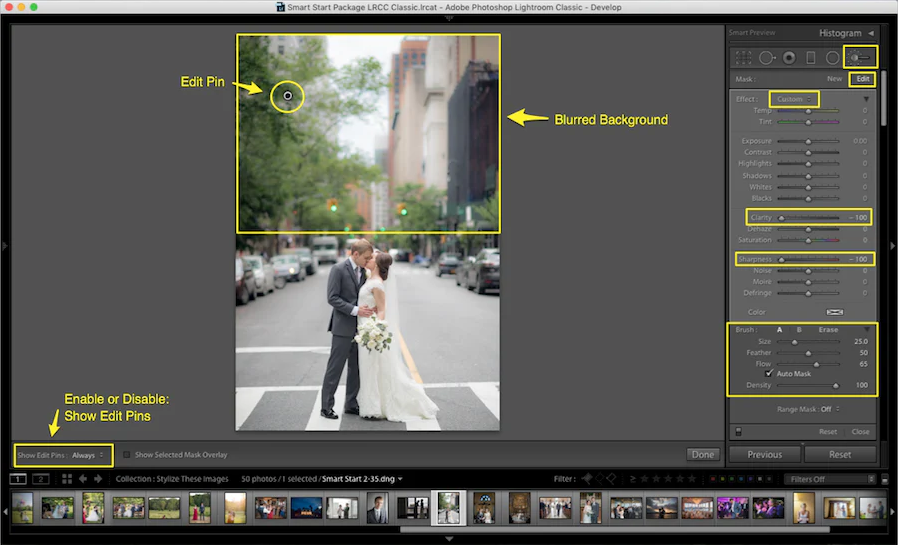
- Adjust the edges of your mask to ensure a smooth transition. You can use the Feathering slider to soften the edges, which helps in creating a more natural blur.
3. Apply Blur to the Background
- With the background selected, lower the Clarity slider to soften details and give the background a blurry effect.
- You can also adjust the Sharpness slider to enhance the out-of-focus effect further. Reducing clarity and sharpness is an effective way to blur the background without losing too much color detail.
- For a more pronounced blur, experiment with the Texture slider, lowering it to add softness. Combining clarity, sharpness, and texture adjustments allows you to customize the blur to fit your creative style.

4. Fine-Tune the Blur Effect
- Depending on the photo, you may want to add a slight Vignette to focus attention further toward the center of the image. Go to the Effects panel and adjust the vignette settings to subtly darken the edges.
- Experiment with the Exposure and Contrast sliders in the mask to deepen the blur, giving the background a more cinematic feel if that aligns with your image.
5. Enhance the Subject for Balance
- To make your subject stand out even more, consider adding minor enhancements to its clarity and sharpness. You can do this by selecting the original subject mask (the inverted one from earlier) and adjusting the Clarity and Sharpness sliders slightly upward.
- By balancing background and subject adjustments, you’ll achieve a well-defined subject with a soft, blurred background.
Extra Tips and Hacks for Blurring Backgrounds in Lightroom
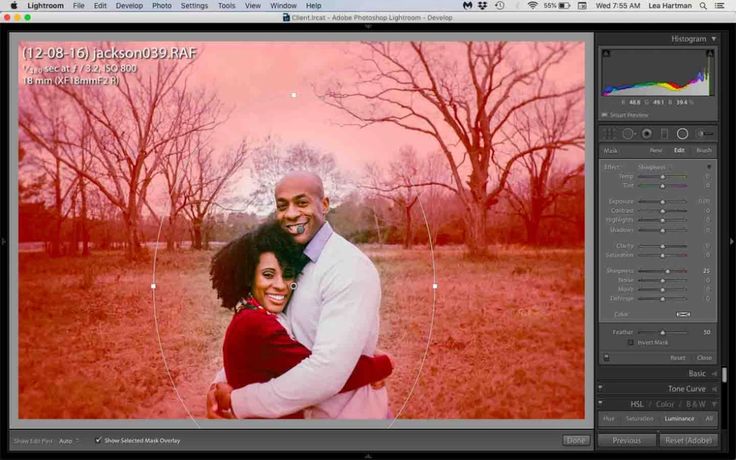
- Use the Radial Filter for Subtle Background Blur: If you only want to blur parts of the background, try the Radial Filter tool. Create an oval selection around your subject and apply similar adjustments to clarity, sharpness, and texture within this area.
- Combine Masking Techniques: You can use multiple masks in Lightroom to target different background areas. This method is ideal for complex scenes where some background elements need more or less blur.
- Presets for Consistency: Create a custom preset with blurring adjustments if you frequently blur backgrounds in similar images. This way, you can quickly apply your preferred settings to new photos.
- Avoid Over-Blurring: Blurring the background too much can create an unnatural look, so aim for a subtle, professional effect that maintains some texture.

Frequently Asked Questions
Can I blur only part of the background in Lightroom?
You can use multiple masks or the Radial Filter tool to target specific background areas. This way, you can selectively blur background parts while keeping other areas sharp.
Which Lightroom version is best for background blurring?
Both Lightroom Classic and Lightroom CC offer powerful masking tools suitable for background blurring. Lightroom Classic, however, provides more control and detail adjustment options.
Can I blur the background without using the masking tool?
The masking tool is the most effective way to blur backgrounds in Lightroom. Although you can reduce clarity and sharpness globally, this would affect the entire image, not just the background.
Will blurring the background affect the image quality?
Blurring the background using masks in Lightroom is non-destructive, meaning it won’t permanently alter the original image. Lightroom’s adjustments are applied on a separate layer, so you can always fine-tune or remove them.
Is Lightroom good for portrait blurring?
Lightroom’s masking tools are excellent for portrait background blurring, as they allow precise control over the area you want to blur. However, consider using Lightroom with Photoshop if you’re looking for more extensive blur effects.
Blurring the background in Lightroom is a straightforward yet effective technique to add depth to your photos. With these steps, you can create visually engaging images that emphasize your subject beautifully.

